
Free firmware · 4.3″ touch screen · Mirrors SkyScope
SKYSCOPE SATELLITE
A second screen for your SkyScope
A 4.3″ display that shows your SkyScope radar anywhere in the house. SkyScope does the work; every Satellite on your Wi-Fi shows the same sky, and follows when you change the range, filters or map.
See it run
The Satellite's own drawing code, run on a computer and fed by SkyScope over Chicago O'Hare at 50 miles, once a second as on the board: airspace, runways and every aircraft SkyScope sees.
On the screen
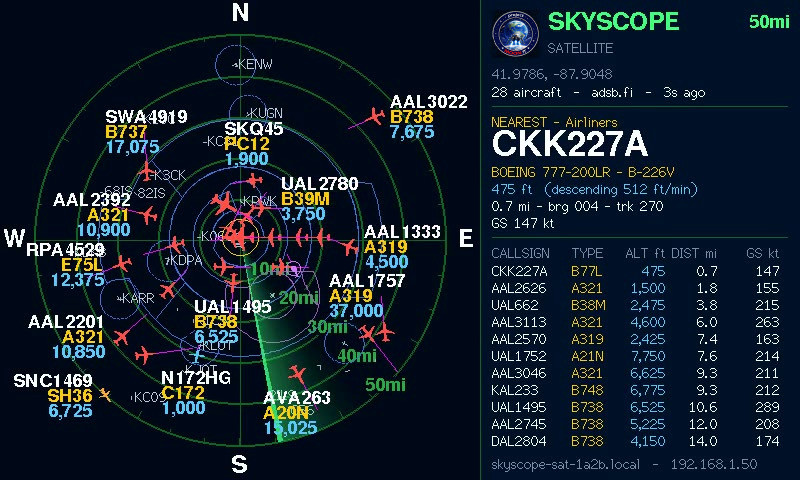
- SkyScope's picture
The same scope your SkyScope shows: aircraft, runways, airspace and departure and arrival routes, with its own sweep.
- Nearest aircraft
The nearest flight, exactly as SkyScope picks it.
- The list
SkyScope's aircraft list, nearest first.
- Its address
This Satellite's small web page, for pointing it at your SkyScope.
How it works
SkyScope gathers the aircraft (from adsb.fi, your own receiver, or both) and works out the picture. Once a second, over your Wi-Fi, each Satellite asks for it and draws it. Change the range, filters or map on SkyScope's settings page and every Satellite follows.
What it does
- The full pictureEverything SkyScope draws: aircraft, runways, airspace, and departure and arrival routes (SIDs and STARs).
- Always in stepChange the range, filters or map once on SkyScope's settings page, and every Satellite follows.
- SmoothFresh positions once a second, with the aircraft gliding between them and its own sweep.
- Your receiver tooIf SkyScope uses your own SDR receiver, the Satellites show it.
- As many as you likeOne in the kitchen, one in the workshop: each one asks SkyScope for the picture on its own.
- Finds SkyScopeName the Pi skyscope and the Satellite finds it by itself. Otherwise, type in the address SkyScope gives you.
What you need
- Display
Sunton ESP32-8048S043: an ESP32-S3 board with a 4.3″ 800×480 capacitive touch screen.
- Power
A USB-C data cable and any 5 V USB supply of 1 A or more.
- SkyScope
SkyScope 1.1 or later running on your network (a Raspberry Pi, Mac or PC), with its settings page on.
- Wi-Fi
A 2.4 GHz network that SkyScope is on too.
Set it up
- Download
Get the Satellite firmware (one .bin file) from the Downloads page.
- Program it
Plug the board in, open Espressif's web flasher in Chrome or Edge, connect, and program the file at address 0x0. Nothing to install.
- Join its Wi-Fi
From a phone, join SkyScope-Satellite-Setup. Choose your network and enter its password.
- Point it at SkyScope
Leave the SkyScope address as skyscope.local, or enter the Satellite address from the About tab of SkyScope's settings page. Save: your radar appears.
Hold BOOT for 3 seconds at any time to set up Wi-Fi again. Each Satellite has a small web page at the address on its screen, for changing which SkyScope it follows. The guide (PDF, on the Downloads page) covers every step and what to do if something doesn't work.
The desk console
A free 3D-printable case in the style of an air traffic radar console: the screen tilted back to 65° under a hood, a desk ledge in front and radar rings on the sides. It's 154 mm wide, 102 mm deep and 112 mm tall, and it fits the SkyScope Mini too.
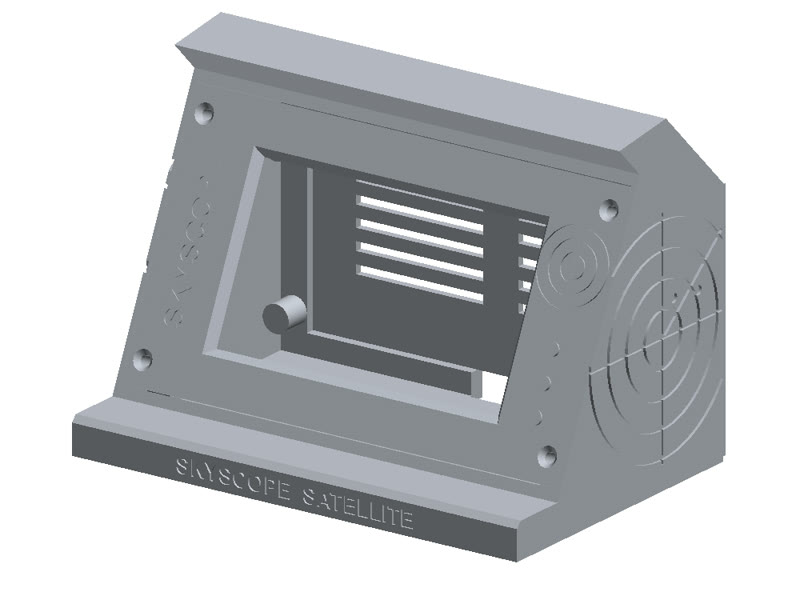
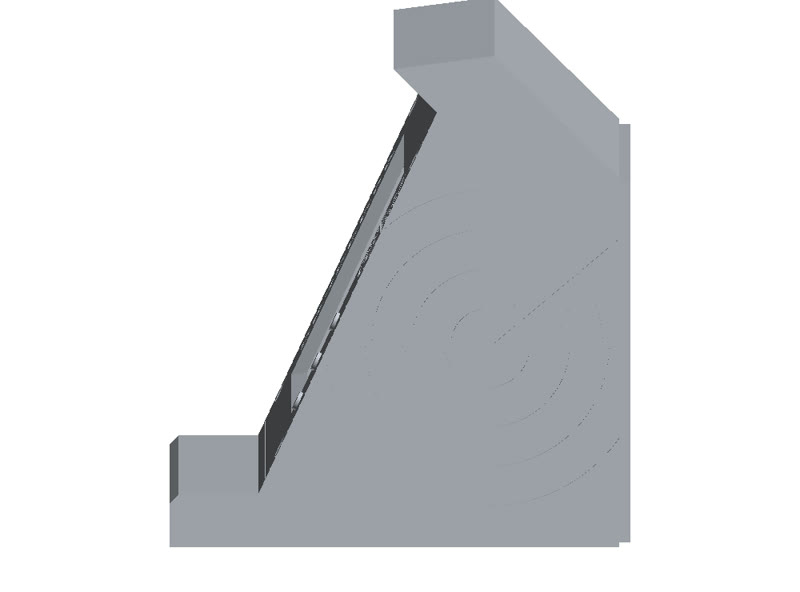
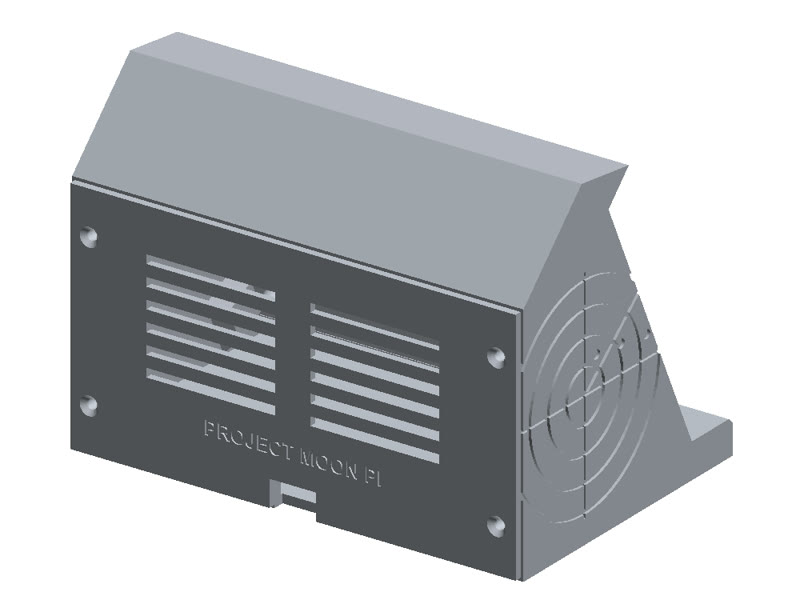
The download has the parts to print (STL), the CAD models (STEP) and a quick fit-test piece, with a parts list: brass M3 heat-set inserts at every screw point, and the screws. Print the fit test first: the board's maker publishes no drawing, so a few sizes are best estimates, and the notes show what to measure.
Mini or Satellite?
| SkyScope Mini | SkyScope Satellite | |
|---|---|---|
| Needs a computer | No | Yes: SkyScope on a Pi, Mac or PC |
| Aircraft from | adsb.fi over the internet | SkyScope (adsb.fi or your own receiver) |
| Updates | Every 5 seconds | Every second |
| Runways | Major airports | As SkyScope draws them |
| Airspace and routes | No | Yes |
| Filters and range | On the Mini (touch and its web page) | Set once on SkyScope; all Satellites follow |
| Best for | A radar on its own, anywhere with Wi-Fi | Extra screens for a SkyScope you already run |
Both run on the same board, so you can switch one to the other by programming the other firmware. More about the Mini ›
Get the Satellite
Free firmware with a step-by-step guide. Early release: it builds cleanly and its screen is checked with the same drawing code on a computer (the demo above), but it hasn't yet been run on the board itself. If something doesn't work, tell us.
Go to the download